Wednesday, 30 March 2011
kempton antiques market
I spent yesterday morning at Kempton antiques market, in Sunbury. It was well worth the early start and drive out of London! There were so many stalls selling so many different items - china & glass, books, linen and crochet, jewellery, clothes and bags. There was so much furniture I thought I was going to hyperventilate! There were lovely chairs, sideboards, tables and so many different storage options. When I asked about prices, I didn't think they were too bad (not cheap but not prohibitively expensive either). For sheer variety, it is definitely worth a visit.
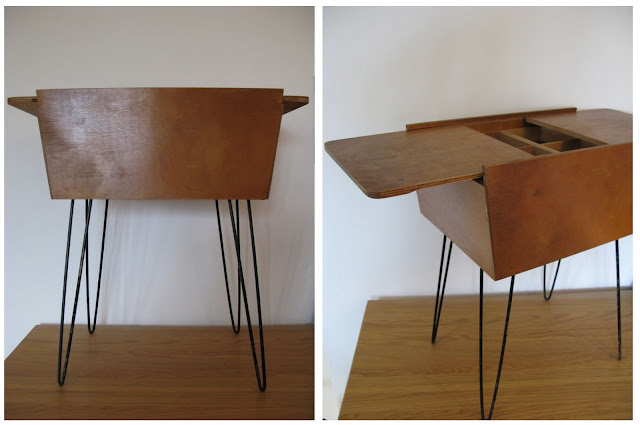
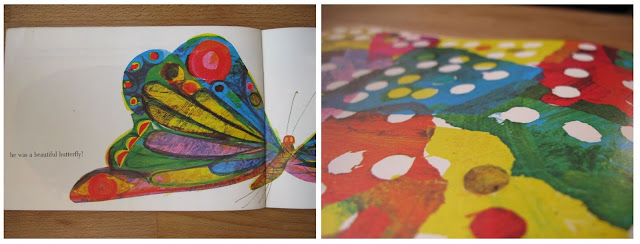
I came home with a fab atomic sewing box (from the 50s I think), and a couple of really interesting 70s Canadian children's books from Brunswick Press. I haven't seen them before and a google search didn't offer up any info either. The illustrations are great - so vivid!
Friday, 25 March 2011
spring quilt tutorial
I have wanted to make a quilt for a while. This is my first attempt, and I am by no means an expert, but I thought it might be useful to document each stage for a tutorial, just incase anyone else fancies having a go!
To make a quilt measuring 136cm x 160cm, you will need:
16 fat quarters of coordinating patchwork fabric
cotton for your backing 140cm x 165cm (I used a single flat sheet)
batting 140cm x 165cm
thread and pins
I bought my fabrics here and here, and I was really surprised by how quickly they were posted, I think both came the next day! I used a batting made from recyled bottles, which I bought here.
Step 1
Cut a paper template measuring 12cm by 20cm. Use your template to cut out 133 rectangles. I drew my design on paper first, so knew how many of each fabric to cut. Lay your rectangles out on a flat surface to make sure you are happy with your design. You will have 7 rows of 9 blocks and 7 rows of 10 blocks.
Step 2
Using a 1cm seam allowance, stitch the blocks in the 1st vertical row together. Press all seams towards the bottom of the row. Repeat with the remainder of the vertical rows. Then join the horizontal rows together using a 1cm seam allowance, offsetting as shown in the photo. Press all seams to one side once all rows are attached. Trim the top and bottom of the quilt to form a rectangle.
Step 3
Lay the batting on a flat surface, and then lay the backing fabric on top. Next lay the completed quilt top with the right side facing the backing. Pin around the edge and trim the backing and batting to the size of the quilt top. Using a 1cm seam allowance, stitch all 3 layers together, leaving a 20cm opening on one side for turning the quilt right side out.
Step 4
Turn the quilt right side out through the opening. Iron the opening inwards, and slipstitch the gap closed.
Step 5
Pin at the corner of each rectangle (making sure to pin through all 3 layers), working from the middle outwards to hold the layers in place. Quilt on the edge of each vertical row working from the top to bottom, and finish each row by pulling the thread through to the back and neatly knotting.

Tuesday, 22 March 2011
featured in etsy treasury
Monday, 21 March 2011
treasury featured on etsy front page
I was lucky enough to have another treasury featured on the etsy front page today. See the original here.
Friday, 18 March 2011
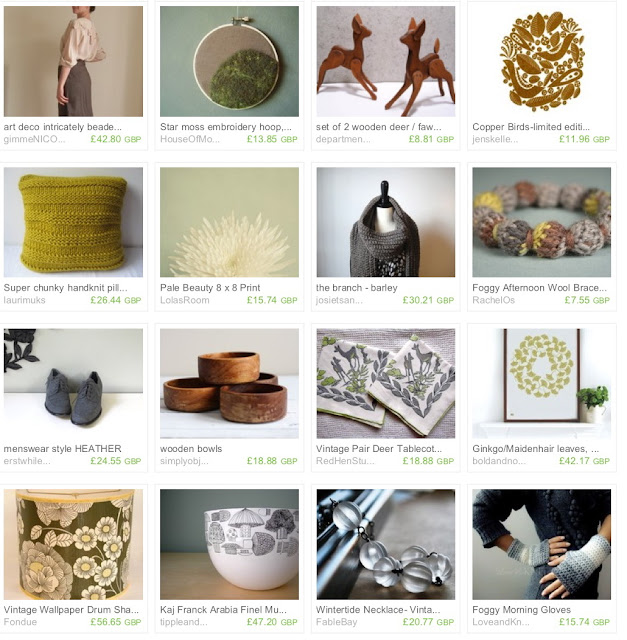
etsy treasury - natural beauty
It's Euro Week next week, so I have compiled a treasury of great European finds, with a natural/nature inspired theme. You can view the original treasury here.
Wednesday, 16 March 2011
ladybird books
I picked up some great Ladybird books - knitting, things to make and tricks and magic. I particularly love the covers. The knitting one is fab, it instructs the reader "Now you have made a headband for yourself, you can make a pincushion for Mother". Brilliant!
Tuesday, 15 March 2011
orla cushion covers
I've recently signed up to Pinterest and am finding it completely addictive! It works as an online visual catalogue, and much better than bookmarking everything! You can set up different boards for different subjects too. Here's a screen grab of my interiors board.
Sunday, 13 March 2011
hughenden manor
Yesterday we visited Hughenden Manor, the home of Victorian Prime Minister Benjamin Disraeli. There were some great colours and textures, I loved the wallpaper!
Friday, 11 March 2011
pincushion added to etsy store
I just added this cute pincushion to the etsy store, using some Orla Kiely flower print. Perfect for keeping your pins and needles in check!
charity shop books

On my usual trawl through the charity shops yesterday, I found a lovely selection of books. I love the Observer's Book series, and found British Architecture and Sea Fishes; fab illustrations in both, particularly in the architecture copy. I also bought a Graham Greene novel and the New York Trilogy because I liked the covers.
Thursday, 10 March 2011
crochet wall art & lavender sachets
I added a one-of-a-kind crochet wall art to my etsy shop this week, along with some more lavender sachets.
Wednesday, 9 March 2011
Tuesday, 8 March 2011
lavender sachets
I have added some lavender sachets to my shop, made from French lavender and japanese linen. Available here.
Monday, 7 March 2011
Friday, 4 March 2011
fairy cakes - yum!
This is the fairy cake recipe Mum taught me when I was little, they're still delicious now!
Fairy cakes with lemon icing (makes 12)
for the cakes:
110g butter
110g sugar
110g self-raising flour
2 large eggs
for the icing:
juice of 1 lemon
300-400g icing sugar
food colouring
Preheat oven to 180C/Gas 4. Cream together butter and sugar until light and fluffy. Add eggs and mix together. Sift in flour and combine well. Bake for 10-15 minutes until golden, and cool on wire rack. Put lemon juice in bowl and gradually add icing sugar until you have a smooth spreadable icing. Add a couple of drops of food colouring to colour the icing. Spread onto top of cooled cakes with the back of a spoon. Eat!
etsy treasury
My home cushion was picked and featured in this lovely treasury today. I really like the brooch and sewing box featured. You can see the cushion in my etsy shop here.
Thursday, 3 March 2011
treasury featured on etsy front page
One of my treasuries reached the etsy front page today - yay! You can see the original treasury here.
the very hungry caterpillar
Tuesday, 1 March 2011
etsy treasury - soft natural tones
I was inspired by this post, to create this etsy treasury. love these colours, subtle and natural. You can see the original treasury here.
little red riding hood pin cushion
A cute little pin cushion, with Little Red Riding Hood japanese zakka ribbon, available here.
Labels:
e17craft,
etsy,
handmade,
little red riding hood,
pin cushion
Subscribe to:
Comments (Atom)


