Monday, 2 May 2011
new blog!
Hello! I've moved blogs, from now on you'll be able to find updates here. Please update your google reader and blogrolls.
Thursday, 28 April 2011
e17craft cushion covers featured on etsy front page
Earlier today I was fortunate to have my mid-century modern cushion covers featured on the etsy front page, via a lovely treasury from sweetharvey . You can see the cushion covers here, and the original treasury here.
Wednesday, 27 April 2011
wimpole estate, second- hand bookshop
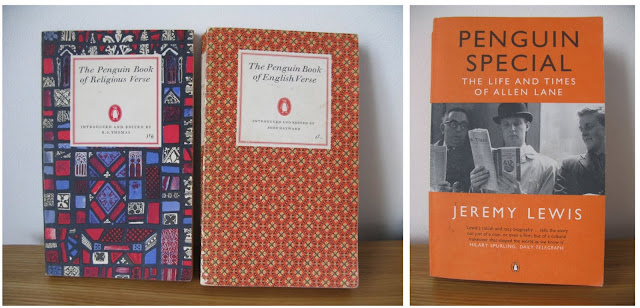
There is a fab little second-hand bookshop at Wimpole. Lots of paperbacks were 30p - bargain! Here's my haul from Monday. A sweet old copy of Winnie the Pooh, 3 Penguin Scores (with lovely covers) and the Penguin Book of Religious Verse, to add to my copy of English Verse. I also picked up The Life and Times of Allen Lane, a biography of the Penguin books founder himself.
Tuesday, 26 April 2011
wimpole estate
Yesterday we visited Wimpole Estate, in Cambridgeshire. The hall has far reaching views across the countryside, and is beautiful inside, with a striking yellow drawing room designed by Sir John Soane. The gardens are meandering with plenty of space to explore, and there is also a rare breeds farm on the estate.
Friday, 22 April 2011
cathrineholm kettle
Last week I made my first cathrineholm purchase. I'm so happy with it, as it's in great condition, and the colours are just beautiful. Hopefully it will be the first of many!
Wednesday, 20 April 2011
roasted vegetable and lemon couscous
This is a really tasty light lunch, or would also work well with fish.
Roasted vegetable and lemon couscous (serves 4):
250g couscous
1 yellow pepper
1 red pepper
2 courgettes
1 onion
2 cloves garlic
1 lemon
olive oil
salt and pepper
Preheat oven to 190C. Cut peppers and courgettes into 1 inch pieces and slice the onion. Put into a roasting tray with the crushed garlic and a couple of tablespoons of oil. Season, and roast for 30 minutes. Cook couscous in bowl with boiling water and 1 tablespoon oil. Fluff up couscous with a fork, add the vegetables and combine. Add juice of the lemon and more oil if needed. Season to taste.
Tuesday, 19 April 2011
river cottage brownies
On Saturday, I baked brownies using a recipe from "River Cottage Everyday". They were delicious! I didn't have any beetroot so I opted for the classic option instead, and increased caster sugar to 275g and reduced flour to 125g. I love the other recipes in the book too, definitely worth buying!
Wednesday, 13 April 2011
kenneth townsend and galt
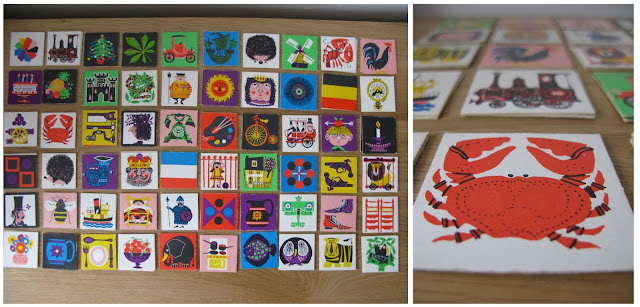
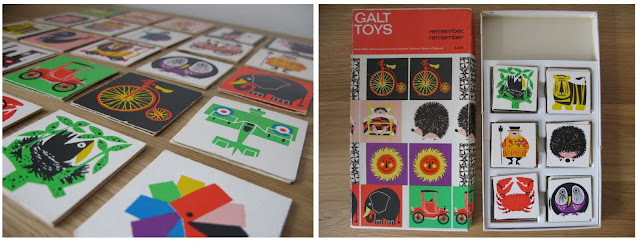
I bought a vintage set of the Galt game "Remember, Remember" on ebay last week and it arrived today. The game is from the 1970s and is illustrated by Kenneth Townsend. There are 120 cards in total, and all of the illustrations are fantastic. At the moment, my favourites are the beefeater, the crab and the owl, but there are so many to choose from. I think I will have to frame some of them!
Monday, 11 April 2011
standen house, sussex
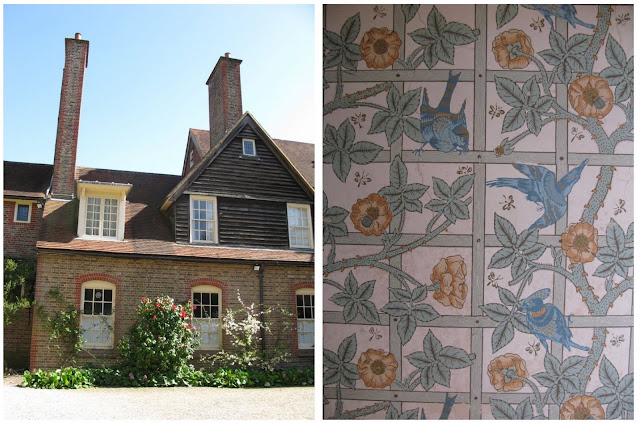
On Saturday, we visited Standen House in Sussex. The house was designed by architect Philip Webb, a friend of William Morris. The house is full of arts and crafts gems, including plenty of Morris & Co wallpaper, tapestry and furniture.
Wednesday, 6 April 2011
etsy treasury

My crochet wall art and floral doorstop were picked and featured in these lovely treasuries today. The first is titled 'oatmeal gifts' and the second is 'brown paper packages'. I really like the weekend hat and winter stems print, also featured. You can see my items in my etsy shop.
Tuesday, 5 April 2011
mid century inspired cushion added to shop
This is my latest cushion cover, a mid-century inspired pattern called 'seedhead'. It is very reminiscent of designs by Lucienne Day and Sanderson, and is available in my etsy shop now.
charity shop finds
After the Robin and Lucienne Day exhibition, we visited a few of the charity shops in and around Chichester on Saturday. I came home with a pair of green Dansk candle holders, and a few classic penguin books. I was thrilled to find the candle holders, as I've been eyeing them up on ebay for a while now!
Monday, 4 April 2011
robin and lucienne day
On Saturday, we went to see the Robin and Lucienne Day exhibition at the Pallant House gallery in Chichester. It was fantastic to see the fabrics and furniture up close. For me it was all about the fabric, the colours were extraordinary! But it was also really interesting to see the fabric and furniture together.
I treated myself to a reproduction of the "too many cooks" tea towel in the shop (it had to be done)! I think I'll frame it and put it in the kitchen, it's far too nice to use!
Afterwards, we spent some time walking around the town and browsing in the charity shops.
Wednesday, 30 March 2011
kempton antiques market
I spent yesterday morning at Kempton antiques market, in Sunbury. It was well worth the early start and drive out of London! There were so many stalls selling so many different items - china & glass, books, linen and crochet, jewellery, clothes and bags. There was so much furniture I thought I was going to hyperventilate! There were lovely chairs, sideboards, tables and so many different storage options. When I asked about prices, I didn't think they were too bad (not cheap but not prohibitively expensive either). For sheer variety, it is definitely worth a visit.
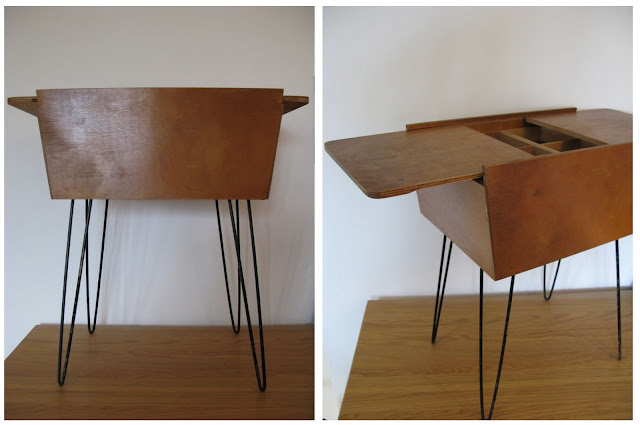
I came home with a fab atomic sewing box (from the 50s I think), and a couple of really interesting 70s Canadian children's books from Brunswick Press. I haven't seen them before and a google search didn't offer up any info either. The illustrations are great - so vivid!
Friday, 25 March 2011
spring quilt tutorial
I have wanted to make a quilt for a while. This is my first attempt, and I am by no means an expert, but I thought it might be useful to document each stage for a tutorial, just incase anyone else fancies having a go!
To make a quilt measuring 136cm x 160cm, you will need:
16 fat quarters of coordinating patchwork fabric
cotton for your backing 140cm x 165cm (I used a single flat sheet)
batting 140cm x 165cm
thread and pins
I bought my fabrics here and here, and I was really surprised by how quickly they were posted, I think both came the next day! I used a batting made from recyled bottles, which I bought here.
Step 1
Cut a paper template measuring 12cm by 20cm. Use your template to cut out 133 rectangles. I drew my design on paper first, so knew how many of each fabric to cut. Lay your rectangles out on a flat surface to make sure you are happy with your design. You will have 7 rows of 9 blocks and 7 rows of 10 blocks.
Step 2
Using a 1cm seam allowance, stitch the blocks in the 1st vertical row together. Press all seams towards the bottom of the row. Repeat with the remainder of the vertical rows. Then join the horizontal rows together using a 1cm seam allowance, offsetting as shown in the photo. Press all seams to one side once all rows are attached. Trim the top and bottom of the quilt to form a rectangle.
Step 3
Lay the batting on a flat surface, and then lay the backing fabric on top. Next lay the completed quilt top with the right side facing the backing. Pin around the edge and trim the backing and batting to the size of the quilt top. Using a 1cm seam allowance, stitch all 3 layers together, leaving a 20cm opening on one side for turning the quilt right side out.
Step 4
Turn the quilt right side out through the opening. Iron the opening inwards, and slipstitch the gap closed.
Step 5
Pin at the corner of each rectangle (making sure to pin through all 3 layers), working from the middle outwards to hold the layers in place. Quilt on the edge of each vertical row working from the top to bottom, and finish each row by pulling the thread through to the back and neatly knotting.

Tuesday, 22 March 2011
featured in etsy treasury
Subscribe to:
Comments (Atom)


